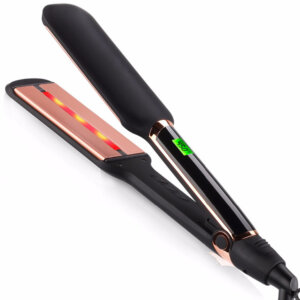
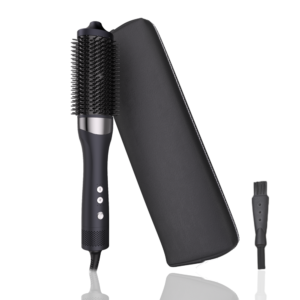
When it comes to achieving smooth, frizz-free hair, an ionic hair dryer is a styling essential that many of us rely on daily.However, just like any other small appliance, your ionic hair dryer needs regular cleaning and maintenance to ensure it continues to perform at its best.
Preparation of Cleaning Tools and Materials
Before embarking on the cleaning process of your ionic hair dryer, ensure that you have gathered all the necessary tools and materials to ensure a smooth and effective cleaning experience. Here’s a checklist of what you’ll need:
-
Soft Microfiber Cloth: Choose a lint-free, microfiber cloth to gently wipe away dust, dirt, and fingerprints from the exterior of your ionic hair dryer. Its soft texture won’t scratch the surface, preserving the sleek look of your styling tool.
-
Cotton Swabs (Q-Tips): These are essential for accessing tight spaces and removing debris that may accumulate in hard-to-reach areas, such as the vents or around the buttons and switches.
-
Isopropyl Alcohol or Dedicated Electrical Cleaner: Use either isopropyl alcohol (at least 70% concentration, diluted with water if necessary for sensitivity) or a specialized cleaner designed specifically for electrical appliances. Avoid using water directly on your ionic hair dryer to prevent electrical hazards.
-
Screwdriver (Optional): If you plan to disassemble your ionic hair dryer for a deeper clean, especially to access the filter or internal components, a screwdriver may be necessary. Always ensure you have the correct size to avoid stripping the screws.
-
Protective Gloves (Optional): While not strictly necessary, wearing protective gloves during cleaning can help prevent irritation from cleaning agents or accidental scratches from sharp edges.
By assembling these tools and materials beforehand, you’ll be well-equipped to tackle any cleaning task that comes your way, ensuring your ionic hair dryer remains in pristine condition and continues to deliver optimal performance.
Disconnect Power and Inspect the Ionic Hair Dryer
Before proceeding with any cleaning steps, safety should always be your top priority. Here’s what you need to do:
Step 1: Disconnect the Power Source
- Unplug the Cord: Ensure that your ionic hair dryer is completely unplugged from the power outlet.
Step 2: Inspect the Exterior
-
Visual Check: Thoroughly inspect the exterior of your ionic hair dryer for any visible dirt, grime, hair tangles, or signs of burning. Pay close attention to the vents, handle, and cord attachment point, as these areas are prone to accumulating debris.
-
Hair Removal: If you find hair tangled around the vents or other parts of the dryer, use a pair of scissors to carefully snip the hair close to the surface. Avoid pulling or tugging the hair, as this could damage the internal components.
| Issue | Solution |
|---|---|
| Hair Tangles | Use scissors to carefully snip hair close to the surface, avoiding forceful pulling. |
| Dirt/Grime Build-up | Note the areas for later cleaning with a microfiber cloth and cleaner. |
| Burn Marks | If present, consider professional service or replacement as internal damage may have occurred. |
By following these steps, you’ll ensure that your ionic hair dryer is safe to handle and ready for a thorough cleaning, addressing any potential issues before they become more serious.
Cleaning the Filter and Vents
The filter and vents of your ionic hair dryer play a crucial role in maintaining its performance and preventing overheating. Here’s how to clean them effectively:
Locate and Access the Filter
- Identification: Most ionic hair dryers have a filter located on the back or bottom of the unit. Consult your owner’s manual for the exact location if unsure.
Cleaning the Filter
-
Gently Remove Dust: Using a cotton swab, carefully remove dust and debris from the filter surface. Avoid using excessive force or sharp objects that could damage the filter mesh.
-
Brushing Option: If the filter is removable, you can also use a soft-bristled brush to gently brush away dust and dirt. Ensure the brush is clean and free of any metal parts that might scratch the filter.
Checking and Cleaning the Vents
-
Visual Inspection: Examine the vents around the exterior of your ionic hair dryer for any signs of blockage.
-
Clearing Blockages: Use a soft-bristled brush or the cool setting of a separate blow dryer (held at a safe distance) to gently blow away any dust or hair that may have accumulated in the vents. Be cautious not to blow debris into the internal workings of the hair dryer.
| Tool | Usage |
|---|---|
| Cotton Swab | Gently remove dust and debris from the filter. |
| Soft-Bristled Brush | Brush away dust from filter (if removable) and vents. |
| Separate Blow Dryer (Cool Setting) | Gently blow away dust from vents, keeping a safe distance. |
Wiping Down the Exterior Shell
Maintaining the aesthetic appeal of your ionic hair dryer involves regularly wiping down its exterior shell. Here’s how to do it safely and effectively:
Prepare Your Cleaning Solution
-
Select Your Cleaner: Choose either a small amount of rubbing alcohol or a specialized electronic cleaner designed for appliances. Ensure the cleaner is suitable for the material of your hair dryer’s shell.
-
Safety Precautions: Always work in a well-ventilated area, away from any open flames or heat sources. Remember to disconnect your ionic hair dryer from the power outlet before cleaning.
Wiping the Shell
-
Use a Microfiber Cloth: Dampen a microfiber cloth with your chosen cleaning solution. Microfiber cloths are gentle yet effective at removing fingerprints, oil smudges, and light dirt without scratching the surface.
-
Gentle Wipe-Down: Gently wipe the exterior shell of your ionic hair dryer, paying attention to areas that tend to accumulate dirt or fingerprints. Avoid applying too much pressure or scrubbing vigorously, as this could damage delicate surfaces.
-
Drying: Once you’ve finished wiping, use a dry microfiber cloth to remove any excess moisture and ensure the shell is completely dry.
Avoiding Internal Moisture
- Cautionary Measures: Be extra cautious not to let any liquid seep into the vents, buttons, or other openings of your ionic hair dryer. Moisture inside the unit can cause damage to electrical components.
Table: Cleaning Materials and Precautions
| Material | Purpose | Precautions |
|---|---|---|
| Microfiber Cloth | Gentle wiping | Avoid excessive pressure or scrubbing |
| Rubbing Alcohol/Specialized Cleaner | Removing dirt, oil | Use in small amounts, away from heat sources |
| Dry Microfiber Cloth | Removing excess moisture | Ensure complete dryness to prevent moisture damage |
By following these steps, you’ll keep the exterior of your ionic hair dryer looking clean and new, while also protecting its internal components from potential damage caused by moisture.
Maintenance and Care Tips
To ensure that your ionic hair dryer continues to perform at its best and lasts for years to come, it’s essential to follow some basic maintenance and care guidelines. Here are some helpful tips:
Regular Cleaning
- Monthly Maintenance: It’s recommended to clean your ionic hair dryer at least once a month. This includes wiping down the exterior shell, cleaning the filter and vents, and ensuring there’s no dust or hair buildup inside.
Avoid Moisture
- Dry Storage: Always store your hair dryer in a dry, well-ventilated area. Moisture can damage the motor and increase the risk of electric shock.
Handle with Care
- Gentle Usage: Use your ionic hair dryer carefully, avoiding drops or impacts against hard surfaces.
Inspect the Power Cord
- Regular Checks: Periodically examine the power cord for any signs of wear or damage. Damaged cords can pose a risk of electric shock or fire. Replace them immediately if you notice fraying, cracking, or exposed wires.
Use a Dedicated Storage Bag
- Protection on the Go: Consider investing in a specialized storage bag designed for your ionic hair dryer.
| Maintenance Task | Frequency | Importance |
|---|---|---|
| Clean Exterior Shell | Monthly | Maintains aesthetics, prevents dust buildup |
| Clean Filter & Vents | Monthly | Ensures optimal airflow, prevents overheating |
| Store in Dry Location | Always | Prevents motor damage, reduces risk of electric shock |
| Handle Gently | Every Use | Protects internal components from damage |
| Inspect Power Cord | Regularly | Prevents electric shock or fire hazards |
| Use Dedicated Storage Bag | When Traveling | Shields from dust, scratches, accidental impacts |
Last Updated on 03/27/2025 by sales04

