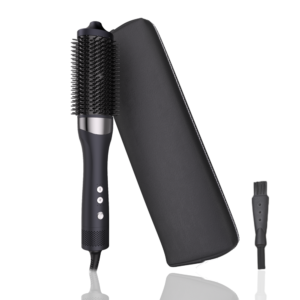
Ever wondered how to open an envelope discreetly without leaving any damage? Whether you’re trying to preserve the integrity of the envelope for personal or professional reasons, the heat from a mini hair dryer helps loosen the adhesive, allowing you to gently open it without tearing. In this guide, we’ll walk you through the steps to carefully and successfully open an envelope using this handy tool.
Why Use a Hair Dryer to Open an Envelope?
If you’re wondering why you would use a hair dryer, especially a mini hair dryer, to open an envelope, there are several key reasons.
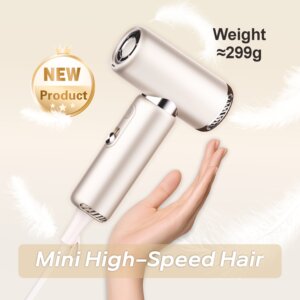
Using heat to soften the adhesive ensures that the envelope remains intact and can even be resealed afterward. For those who are concerned about precision and efficiency, using a compact and portable mini hair dryer like the Mesky Duet Blowdry is the perfect solution. It’s small enough to handle easily while providing just the right amount of heat.
| Scenario | Why a Mini Hair Dryer Helps |
|---|---|
| Need to temporarily view a document | Opens the envelope without leaving damage |
| Want to reseal the envelope afterward | Heat softens adhesive, making it easier to reseal |
| Prevent visible signs of tampering | No tearing or ripping, keeping it intact |
For best results, we recommend trying a reliable mini hair dryer like the Mesky Duet Blowdry.
The Science Behind Opening an Envelope with a Hair Dryer
When using a mini hair dryer to open an envelope, the key lies in how heat affects the adhesive on the envelope’s seal. Most envelopes are sealed with an adhesive that softens when exposed to heat.
The hot air from a mini hair dryer helps to break the bond between the glue and the paper, making it easier to separate the two. If the air is too hot or applied for too long, you risk burning or warping the envelope. On the other hand, if the air is too cool or not applied long enough, the adhesive won’t soften, and the envelope may tear when you attempt to open it.
Here’s a guide on the ideal temperature and time you should use when working with different envelope materials:
| Envelope Material | Ideal Temperature (°C) | Recommended Time (Seconds) | Best Mini Hair Dryer Setting |
|---|---|---|---|
| Standard Paper | 50-60°C | 20-30 seconds | Low Heat Setting |
| Thick Cardstock | 60-70°C | 30-40 seconds | Medium Heat Setting |
| Recycled Paper | 40-50°C | 20-25 seconds | Low Heat Setting |
By choosing a mini hair dryer like the Mesky Duet Blowdry, you gain greater control over the heat and airflow, making it easier to soften the adhesive without damaging the envelope.
Tools You’ll Need
To successfully open an envelope using a mini hair dryer, you’ll need more than just the dryer itself. Having the right tools on hand will help you open the envelope smoothly and ensure you don’t accidentally damage the paper. Here’s a list of essential tools to gather before you begin:
| Tool | Purpose |
|---|---|
| Mini Hair Dryer | Provides the heat to soften the adhesive on the seal |
| Tweezers | Helps gently lift the seal without tearing the paper |
| Dull Knife | Used to carefully slide between the envelope flap and body, avoiding damage |
| Flat Surface | A firm, stable surface to work on for better control |
While the mini hair dryer is the main tool you’ll rely on, other small items like tweezers or a dull knife can make the process easier and more precise. For example, tweezers help you lift the edges of the envelope without causing rips, while a dull knife can be used to gently pry open any stubborn areas.
To maximize precision and control, it’s best to use a mini hair dryer like the Mesky Duet Blowdry, which offers adjustable heat settings and a lightweight design, making it easier to handle for delicate tasks like this one.
Step-by-Step Guide to Opening an Envelope with a Mini Hair Dryer
Follow these steps carefully to achieve the best results:
1. Preheat the Mini Hair Dryer
Before you begin, set your mini hair dryer to a low heat mode. This prevents excessive heat that could potentially burn or warp the envelope.
2. Aim the Mini Hair Dryer at the Envelope’s Seal
Hold the mini hair dryer about 3-5 cm away from the envelope’s sealed edge. Gently move the dryer back and forth along the seal to distribute the heat evenly. Focus on heating the adhesive rather than the entire envelope to avoid damaging the paper.
3. Use Tweezers or a Dull Knife to Pry Open the Seal
Once the adhesive has softened (this usually takes 20-30 seconds depending on the material), use tweezers or a dull knife to gently lift the flap of the envelope. Start at one corner and work your way along the edge, being careful not to tear the paper.
4. Check If the Seal Has Fully Opened
After prying the seal, check if the envelope flap is fully open. If you encounter resistance, apply more heat using the mini hair dryer for another 10-15 seconds, then try again. Repeat this process until the envelope is completely open.
Here’s a summary of the key steps:
| Step | Action | Time/Temperature |
|---|---|---|
| Preheat the dryer | Set to low heat | 50-60°C |
| Heat the envelope’s seal | Move dryer over the seal, 3-5 cm away | 20-30 seconds |
| Pry open with tweezers/dull knife | Gently lift the envelope flap | N/A |
| Reapply heat if needed | Apply more heat if seal resists | Additional 10-15 seconds if necessary |
By following these steps with a reliable mini hair dryer like the Mesky Duet Blowdry, you’ll be able to open your envelope without damaging it, ensuring the contents remain safe and the envelope intact for resealing.
Opening an envelope with a mini hair dryer is an effective, simple, and non-damaging method. By understanding the science behind the adhesive, using the right tools, and following the step-by-step instructions, you can easily open sealed envelopes while keeping them intact. Common issues like incomplete seal opening or potential warping can be avoided by carefully controlling the heat and handling the envelope gently. Using a reliable mini hair dryer like the Mesky Duet Blowdry ensures you have the precision and control needed for this delicate task.
Last Updated on 12/04/2024 by sales04

